
Origami: How to Make a Sailing Boat
- Sep 11, 2025
- 4 min read
Updated: 5 days ago

We had a wonderful two weeks of summer sailing along the coast of beautiful Cornwall. (And also a lot of minor disasters - you can read about it in our blog, here!)
To make summer last just a little bit longer, we had fun making sailing boats out of origami. Wouldn't they look gorgeous attached to strings like sailing boat bunting?
What's really great is they are so easy to make!
What You Need
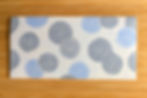
A single sheet of origami paper. Mine, here, is 15cm x 15cm, but you can scale however you like! And if your sheet of origami is a different colour on the reverse, even better - your boat sails will contrast with your boat :)
I'm using one of the sheets from our gorgeous Large Kyoto Yuzen Origami Paper in Blue.
Top Tip!
Practise with old squares of paper until you're ready to use your nicest origami papers!
How to Make an Origami Sailing Boat
Place your origami paper on a table with the patterned or coloured side face down, and with the white side or plain side face up.

Fold the square in half.
Then open up the paper and fold it in half the other way. Unfold again, and your paper will look like this:

Now, turn your paper over so that the patterned or coloured side is uppermost.

Fold it in half on the diagonal.

Open up your paper and fold it in half again, on the other diagonal. Your origami paper will now look like this:

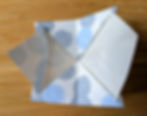
Turn your paper over so that the white/plain side is uppermost. Fold each of the 4 corners to the point in the centre, using the creases as a guide. Your paper will look like this:

To make the sails of your paper boat, lift up one of the centre corners and fold it parallel to the edge of the folded square. The fold is about 8mm roughly. It will look like this:

Repeat on the opposite side, but with a narrower fold, (it will make a bigger sail), like this:

You next need to re-crease two of the folds, to help make the boat easy to construct. First, gently fold the centre line inwards, so that the two sails touch, re-crease the fold and then unfold again.
I'm just using the large chopstick for the photo so you can see!

Second, turn the paper over, and fold the paper in half, along the long crease line in the centre of the sails, like this:

Turn the paper back over, ready to shape your sail boat.

Gently fold both of the sails along their centre creases and push them inwards.
Gather up the 4 corners of the patterned boat shape, and press them flat like a little triangular pocket. Your boat will look like this:

Now we need to shape the bottom of the boat so that it is flat. Take the bottom point and fold it upwards until it follows the crease to the top line of the patterned boat. Crease the fold firmly, so that it is like this:

Next, we want to fold this shape so that it is pushed upwards and hidden inside our sailing boat. You might need a few tries at this until you crack it. Follow this procedure:
Take hold of each of the sails and gently open out your paper. Can you see the creased square shape in the middle of the paper? In the photo below, the chopstick is pointing to the centre of the creased square. It looks like this:

Focussing on the creased square in the middle, pinch the two crossing diagonals within the square, so that they are creased upwards, like this:

Next, fold each of the sides of the paper up so that you can re-crease each edge of the square. This will help the shape fold inwards.

Now, pinch one of the sails and push it gently inwards. Gently bring in the two side edges too, and you will start to see the boat shape forming below the sail with an edge of the creased square forming the bottom of your paper boat. It will look like this:

But go slowly - start to fold forward the sail on the other side too. If you carefully gather up all 4 corners of your boat you will see that the diagonals in the creased square have pushed upwards, and hidden inside the paper shape. Just like this:

All you have to do now is press on all of the edges of your boat to make the edges sharp - but don't worry about doing this to the sails - if they are billowing a bit they look like they are full of wind!
If you turn your boat upside down you can see how that creased square with the creased diagonals has folded up. It looks like this:

Now you have your sailing boat which will stand up. Keep practising, and when you feel happy with the process, make your paper boat with your nice origami paper!
The hull of the boat will separate, but you could always stick it together if you would like to with glue or sticky tape!

Your paper boats can be used for having fun floating them in water (note, they will get soggy!). Or why not make a few sailing boats and create summer sailing bunting!
Have fun making them!
Cathy
x